22. How to further secure your WHMCS installation
Now that you've installed WHMCS, there are a few steps that can be taken to bolster its security.
Open up your favorite FTP client or your control panel's file manager. For this tutorial, we will be using cPanel's file manager, but anything will work.
By default all files and directories contained in the public directory of a web server can be directly downloaded by anyone. For certain content such as downloads and attachments, this behavior is generally undesirable.
1) Start by moving the attachments, downloads, and templates_c directories outside of public access.
On most shared hosting accounts, the public directory is named public_html or www. What we need to do is move the folders below that directory; in most cases, that will mean putting them in your home directory. Our home directory is /home/mybiz123.
2) Let's first create a directory in our home directory. Click here and remove path and click go so we will go to home directory directly.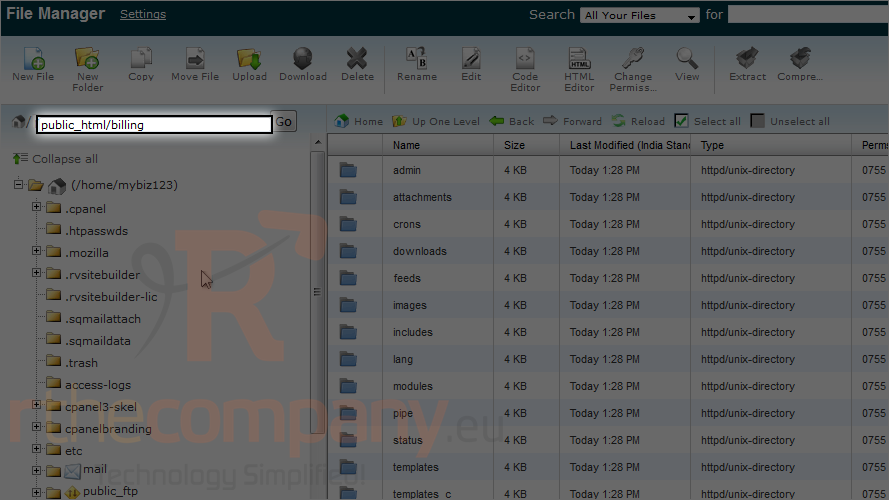
3) Click new folder.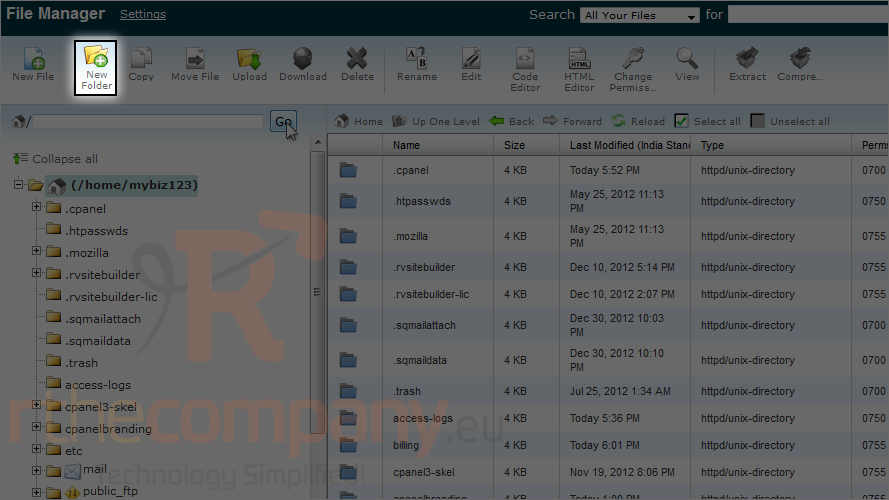
4) Give this folder name, this is where we will move those folders.
5) Click create new folder.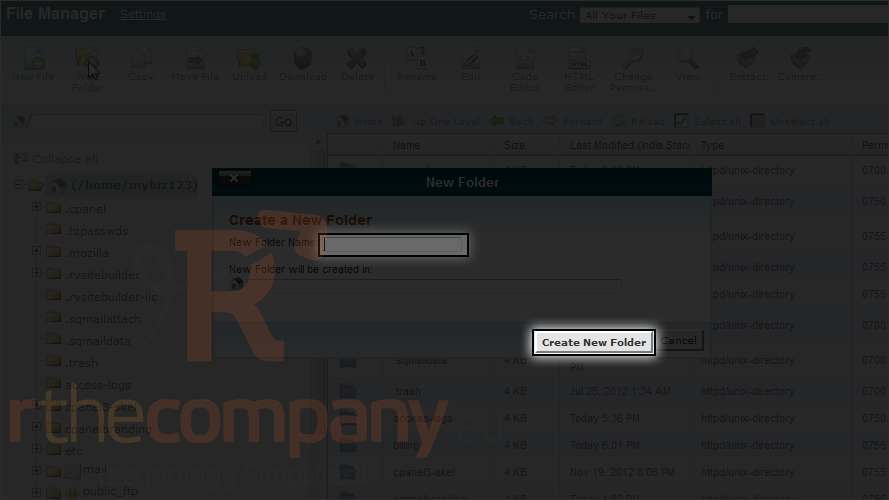
Folder is created successfully, which we can see here.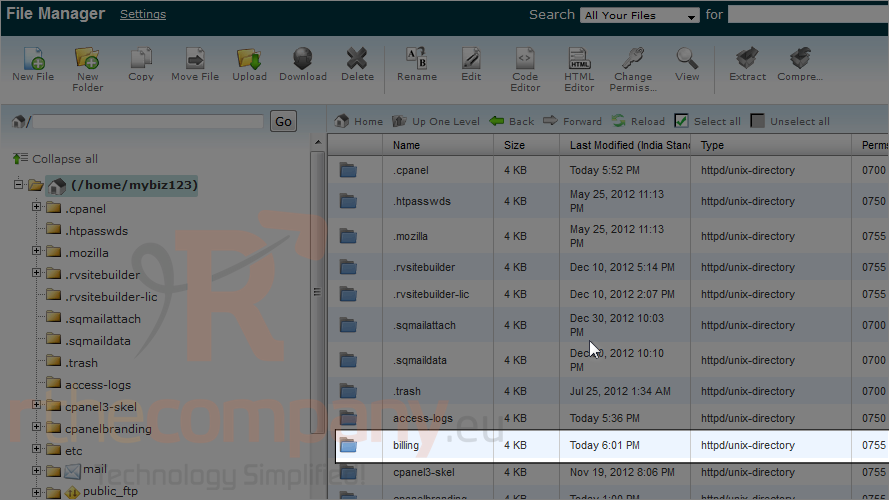
Let's go back to our WHMCS installation folder.
6) Let's select those directories. Please note that you can select multiple directories by holding ctrl and click.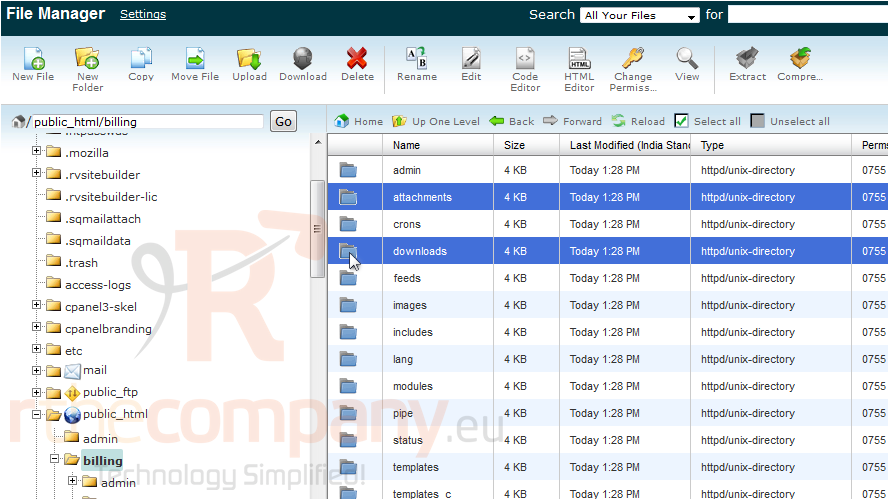
7) Now click move file.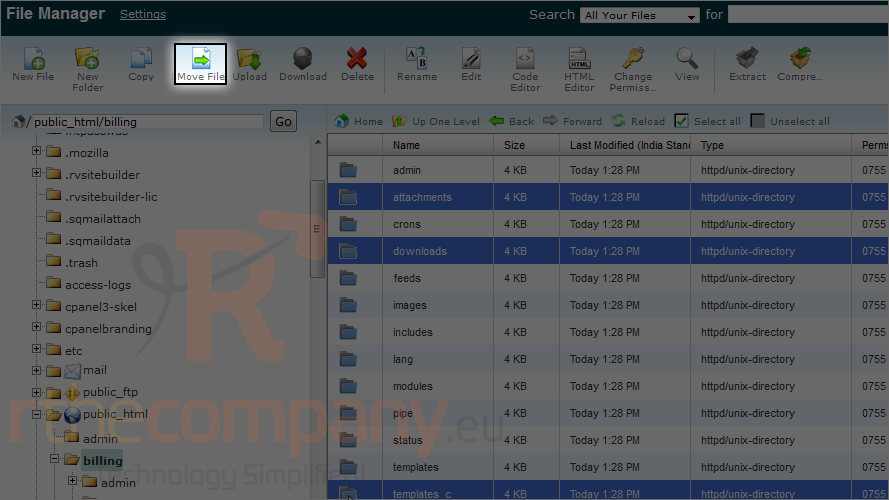
8) Let's place these three directories in the new folder we just created. Set the path to that folder.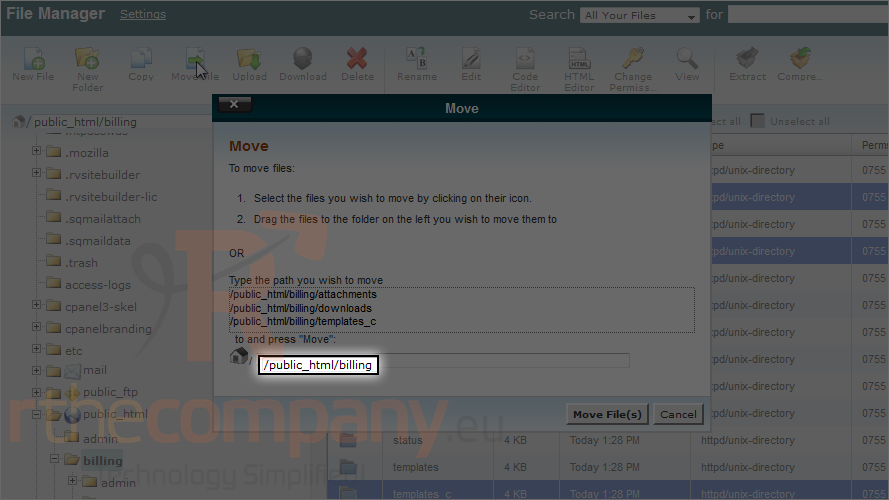
9) Click move file(s).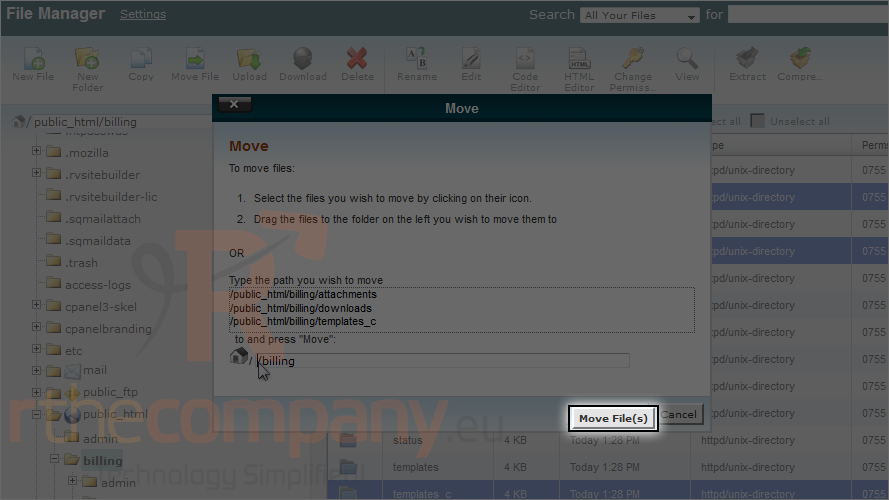
After you are done, you will see the folders disappear.
10) Next, let's rename the admin directory to add some security through obscurity. This will help prevent malicious users from even attempting to log in to your admin area.
Note that the admin directory must remain inside this folder; it cannot be moved like the others only renamed.
11) Select the directory.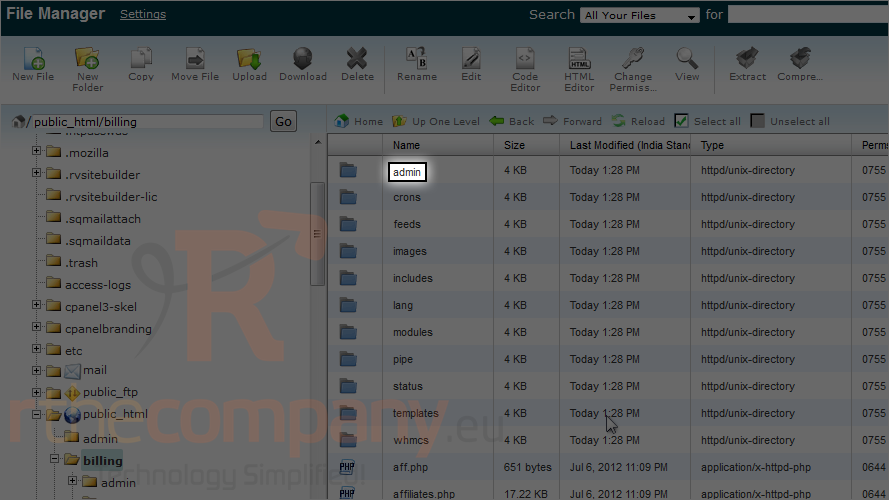
12) Click rename.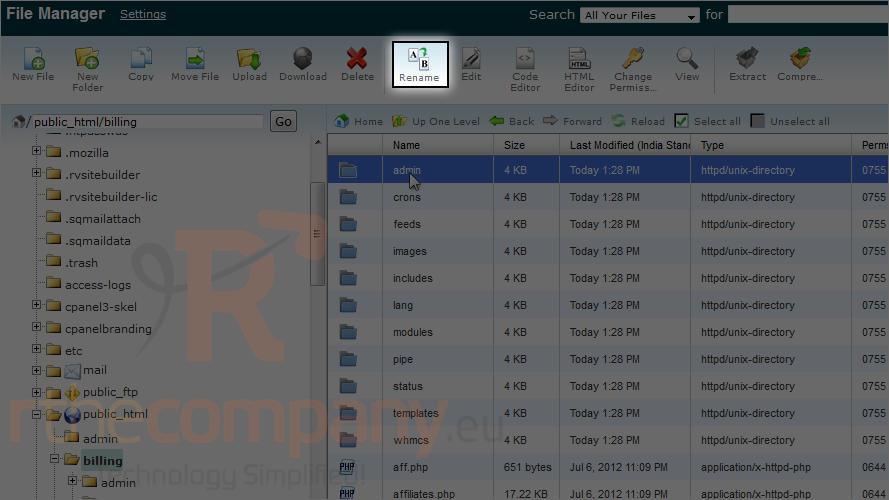
13) Click rename file.
The directory has been renamed.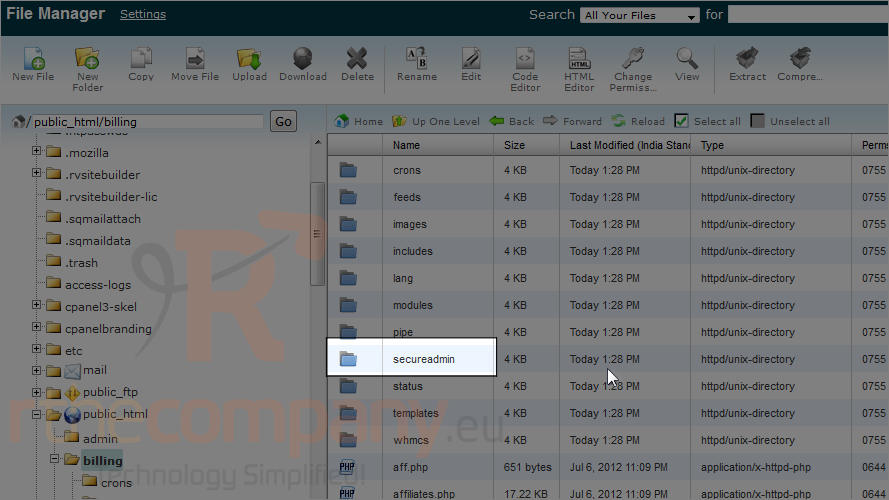
Scroll down.
Last, we must inform WHMCS of the changes to its directory structure.
14) Open configuration.php for editing. Select it first.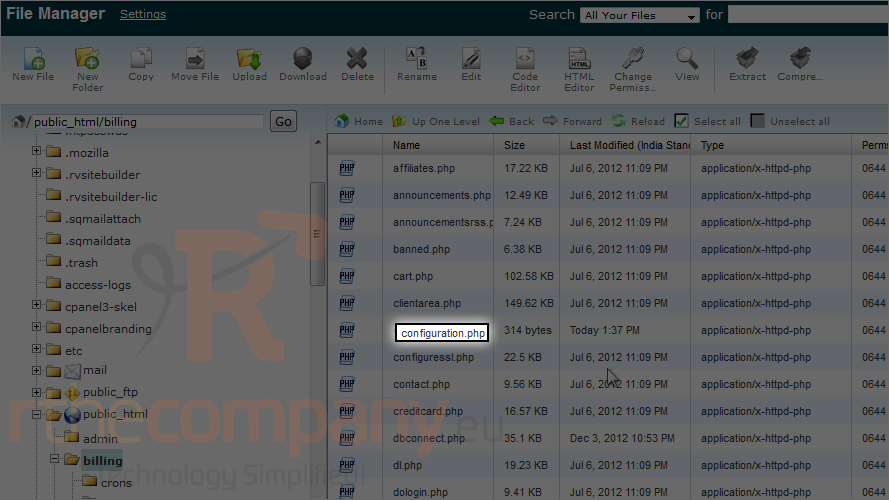
15) Click edit.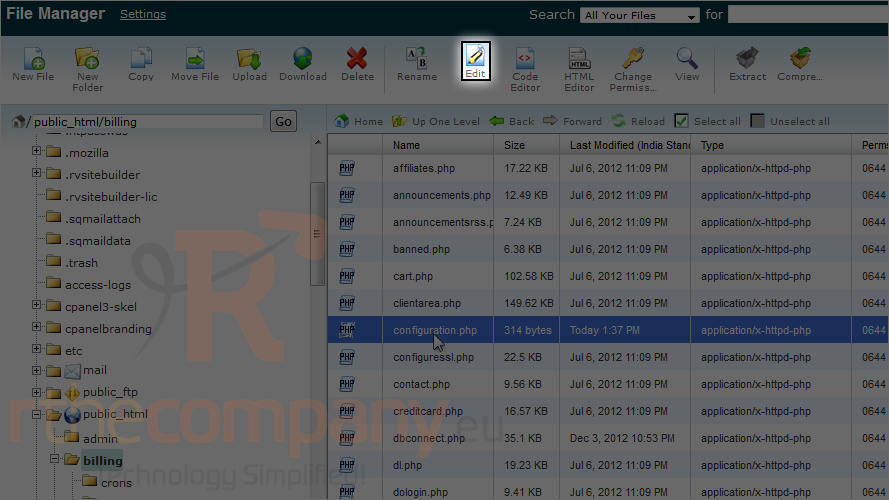
16) First update the variable $templates_compiledir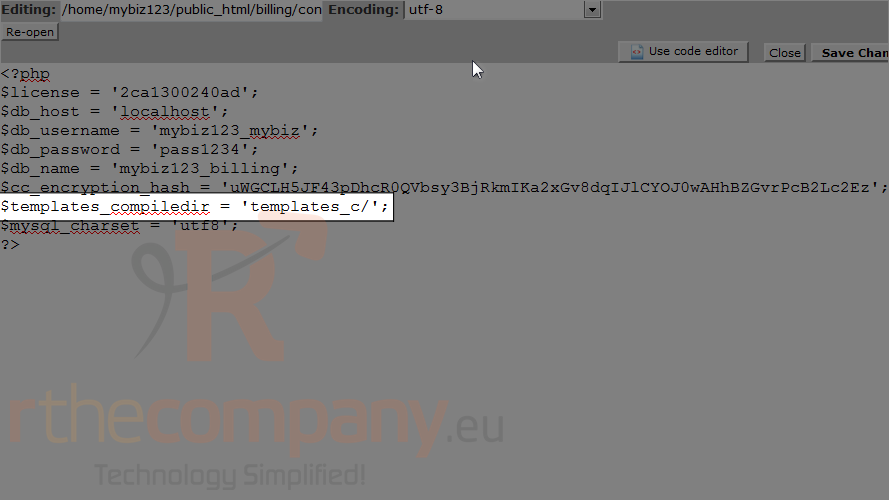
17) Next, add the two variables and directory paths that follow.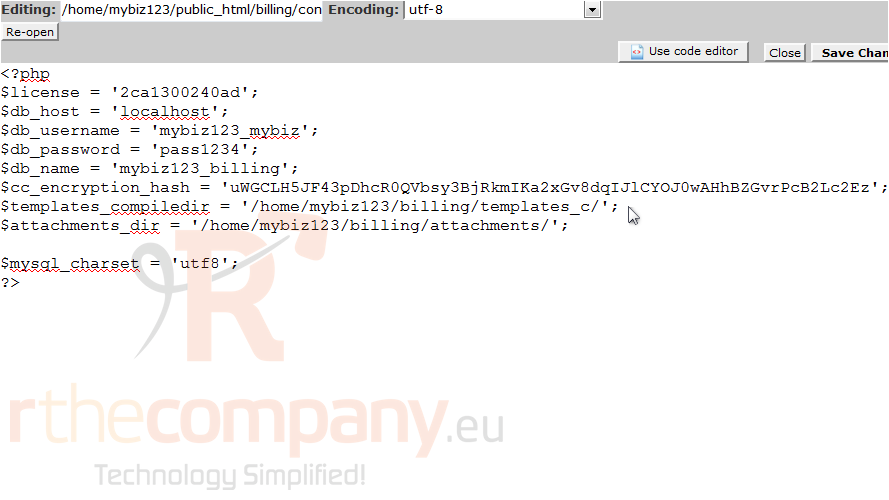
18) Finally, add the following variable to tell WHMCS the new name of the admin directory.
19) Click save changes.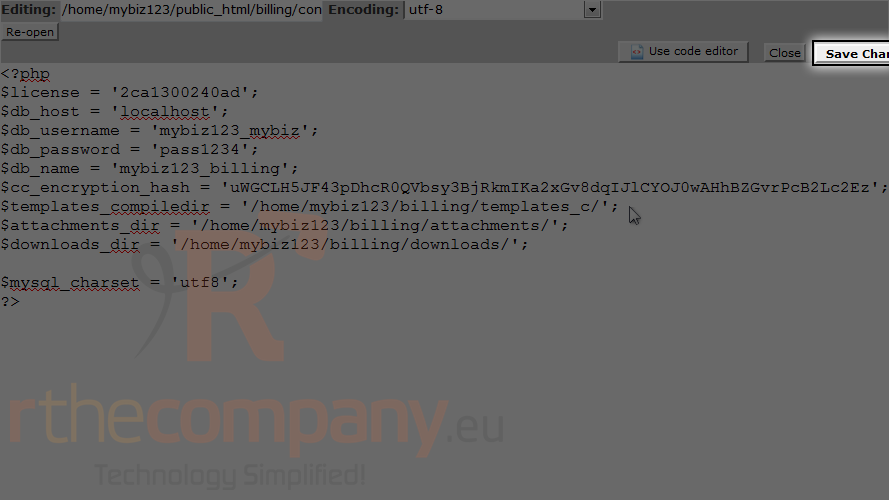
20) Now let's verify that the admin panel works in the new location.
Success! You've finished enhancing WHMCS with extra security.
